

Photography backdrops are essential tools for creating professional-looking photos. Whether you're shooting portraits, product shots, or still-life images, the right backdrop can significantly improve the final result.
This article will explore the different types of backdrops available, how to set them up properly, and some essential tips. From wise backdrop choices to post-processing tips, we'll cover everything you need to know to maximize your photography backdrop.
Key Takeaways
- Securely attach the backdrop to a stand or wall hooks. Make sure it is taut and wrinkle-free.
- Select a backdrop material and color that complements the subject and enhances the shoot's aesthetic.
- Position the subject a few feet from the backdrop to create depth and avoid shadows.
- Use proper lighting techniques to evenly illuminate the backdrop and subject.
- Experiment with different lighting angles and intensities to achieve a cohesive look.
Choosing the Right Photography Backdrop
When choosing the right photography backdrop, consider these factors for a proper backdrop.
Types of photography
Choosing the right photography backdrop hinges on the specific type of photography you're undertaking. Whether portrait, product, or fashion, each demands unique backdrop characteristics for optimal results.
For portraits, opt for fabric backdrops that offer texture and a soft finish. In product photography, vinyl backdrops provide durability and ease of cleaning. Fashion photography benefits from large, seamless backdrops to accommodate full-body shots.
Select a backdrop material that complements your shoot, from muslin for a traditional look to vinyl for practical use, ensuring your backdrop enhances, not detracts from, your work.
Colors and patterns
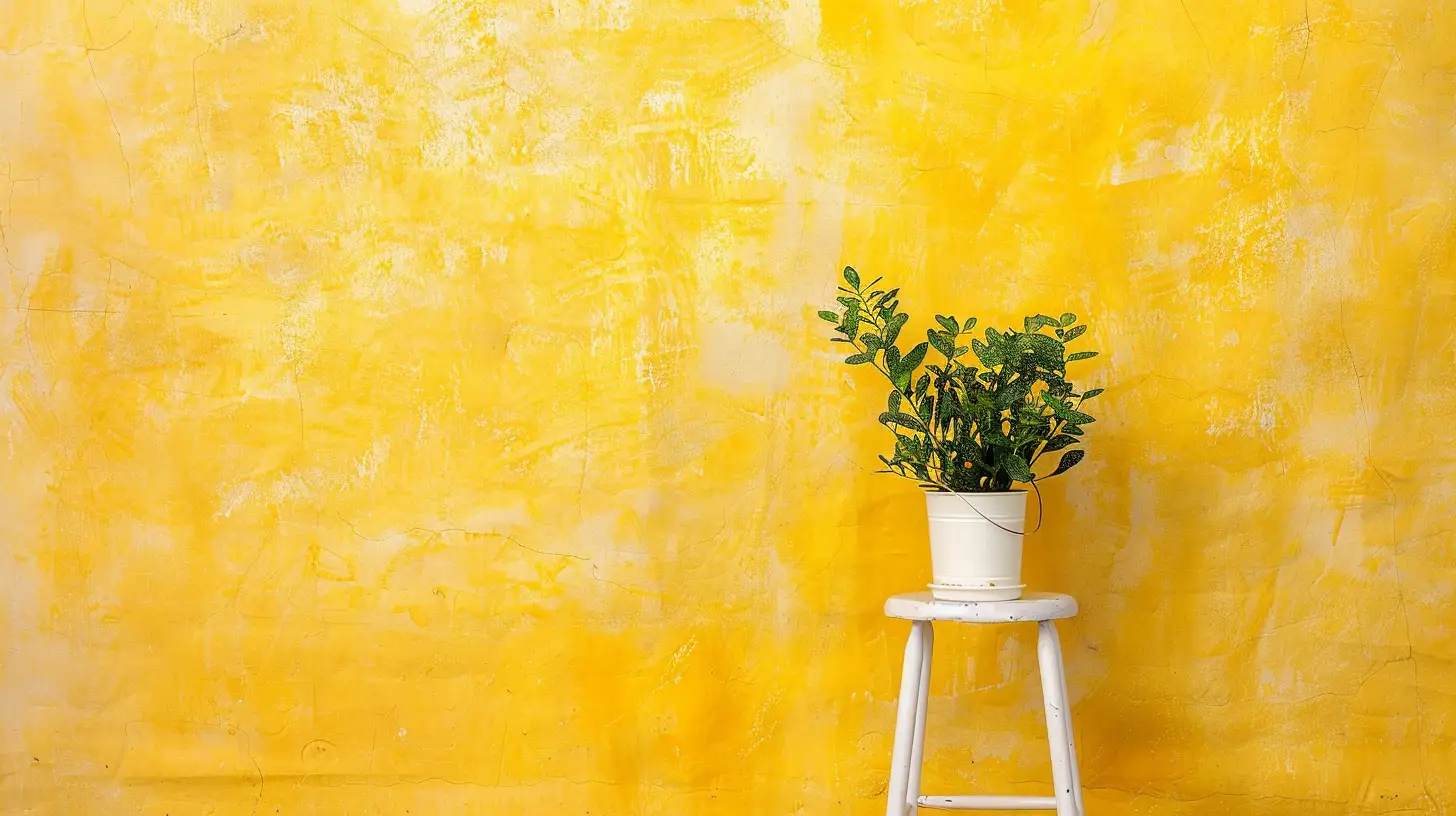
When selecting the perfect color and pattern, assess the subject's skin tone and clothing to ensure a harmonious blend. Opt for neutral tones like gray, beige, or soft pastels for a timeless, elegant look.
Solid backdrops provide versatility and a classic appearance. For more dynamic shots, use vibrant colors like red, blue, or green to infuse energy and impact.
Textured backdrops and patterns include damask, floral, or geometric designs. These introduce depth and visual interest to elevate your composition.
Material considerations
Fabric backdrops are versatile, portable, and light as well. They're great for various setups.
Matte vinyl backdrops are budget-friendly and easy to clean. They're perfect for shoots involving liquids or messy substances.
Lightweight canvas backdrops offer durability and humidity resistance. They're ideal for studio environments.
Seamless paper backdrops provide a smooth, non-reflective surface. But they're less durable and best for controlled settings.
Microfiber backdrops are soft, washable, and available in various patterns. They cater to diverse photography styles.
Considering these traits, choose your material to optimize your shoot's efficiency and visual appeal.
Setting Up the Photography Backdrop
To set up your backdrop, begin by securely assembling your backdrop stand. Ensure each component is firmly connected to provide a stable foundation.
Adjust the height and width of the backdrop stand to match the dimensions of your backdrop. Once adjusted, attach the backdrop securely using clamps or clips, ensuring it's taut and wrinkle-free.
Position the backdrop stand directly behind your subject to create a seamless background. After setup, test the arrangement by taking test shots. This step verifies the backdrop's alignment and ensures no visible wrinkles or shadows.
Fine-tune as necessary, ensuring the backdrop enhances your subject and maintains a professional appearance.
Lighting and Positioning
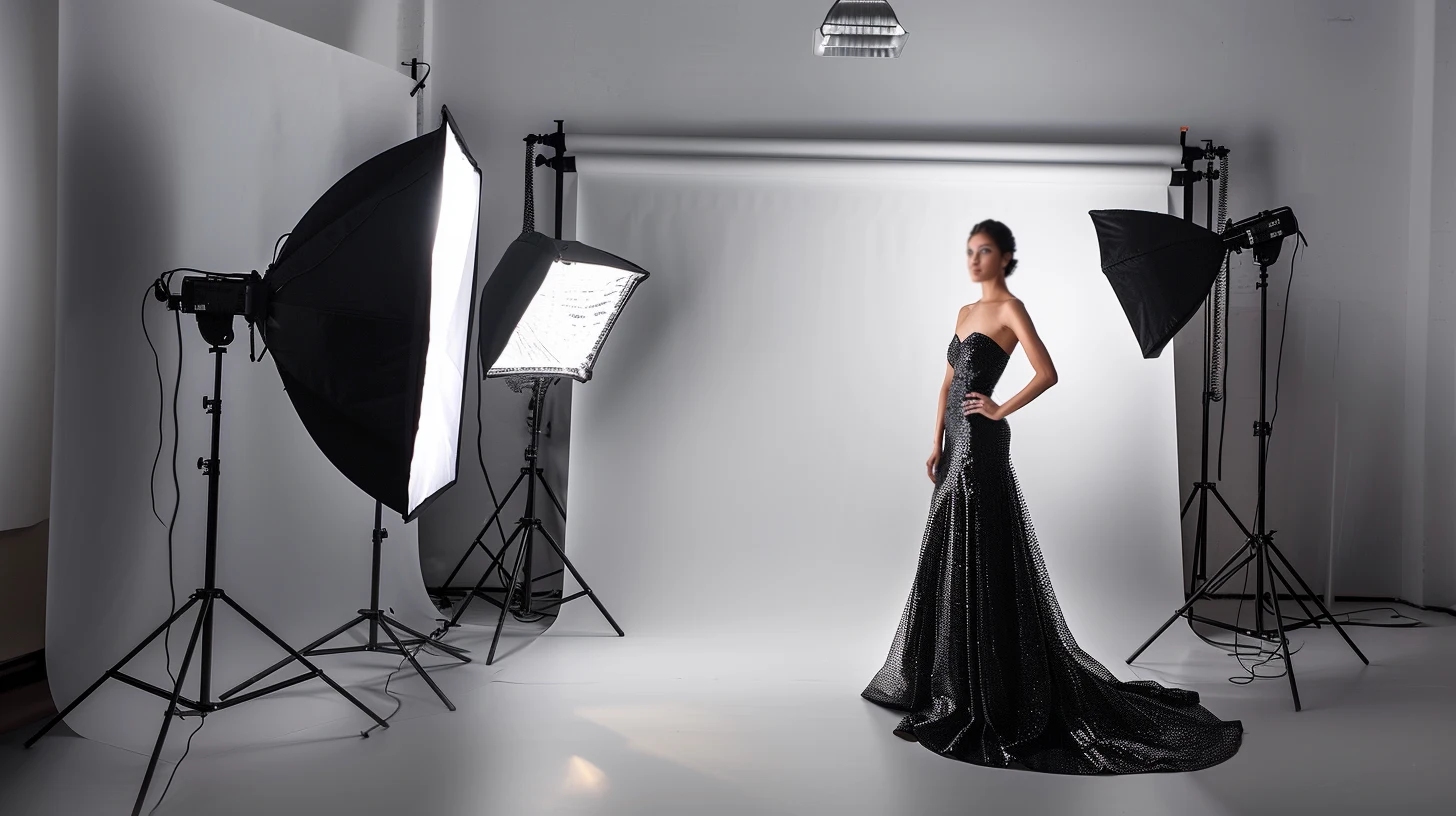
Proper lighting is essential to ensure your subject stands out against the backdrop. Position your lights at strategic angles to avoid harsh shadows and unwanted reflections.
Importance of lighting
Mastering lighting techniques is fundamental in backdrop photography to ensure your subject is well-illuminated and the background appears seamless. Proper lighting eliminates unwanted shadows and highlights your subject, creating a professional look.
Tips for lighting the backdrop correctly
To achieve professional-looking photos, position your main light source at a 45-degree angle to the backdrop. Doing so can reduce shadows and ensure even illumination.
Use a dedicated lighting source to illuminate the photography backdrop evenly, eliminating hotspots and dark patches.
Adjust the distance between your subject and the backdrop to control the level of backdrop blur.
Experiment with various lighting angles and intensities to add dimension and texture.
Incorporate colored gels into your lights to create dynamic and visually appealing effects. This approach enhances the aesthetic and helps achieve a cohesive look.
Fine-tuning these elements will result in a polished, professional image.
Using Props and Accessories
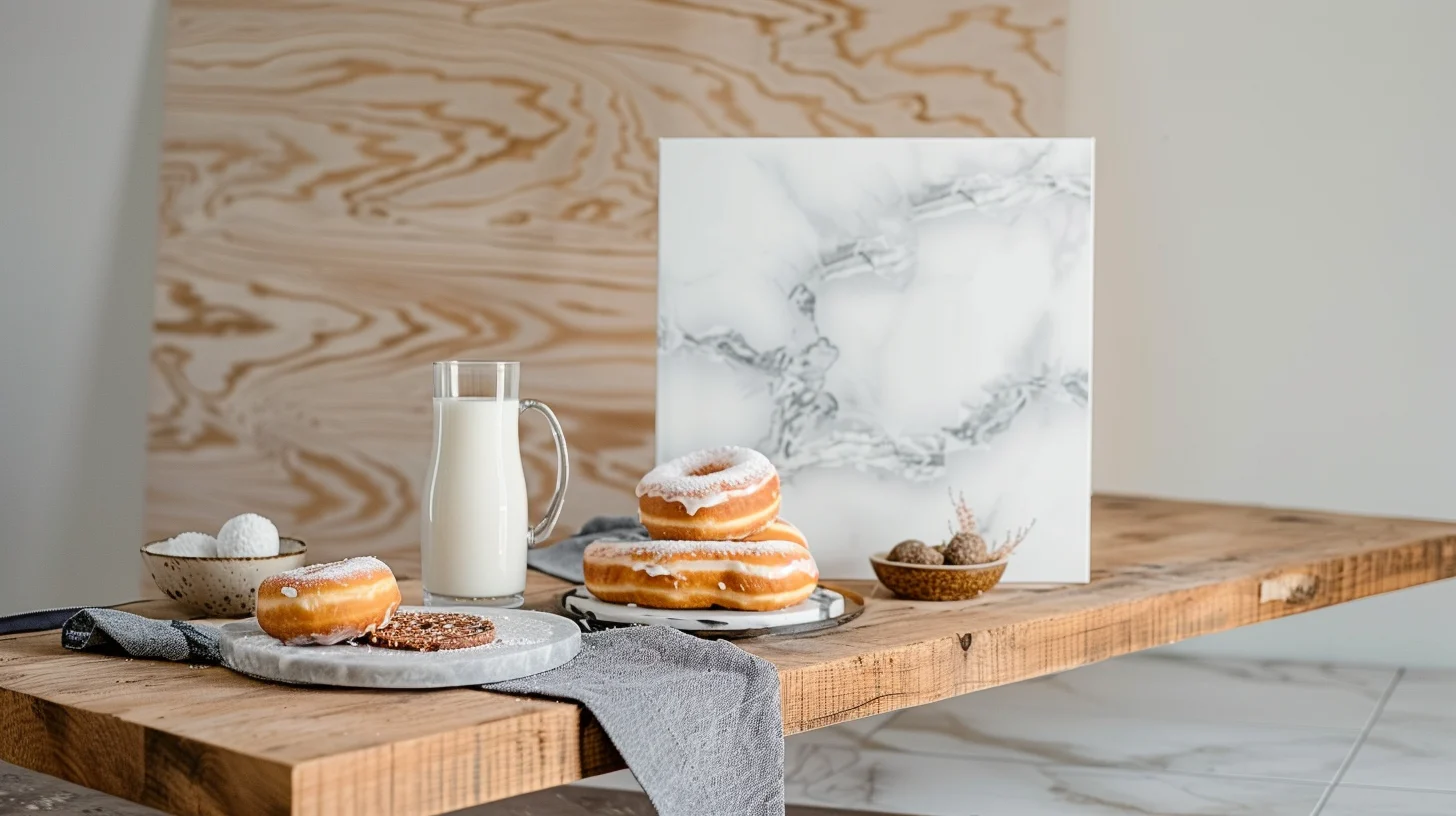
Incorporating props and accessories strategically can transform your backdrop into a versatile and captivating scene. These items enhance both the subject and the composition. Select props that complement your theme and add visual interest.
Use accessories like chairs, stools, or tables to create dynamic poses. Experiment with different textures—fabrics or small objects—to add depth. Adjust your lighting setup with umbrellas or reflectors to ensure even illumination on your subject and backdrop.
By integrating these elements effectively, you maximize the potential of your backdrop. So, you can achieve professional-quality shots that captivate and engage viewers.
Ensuring Proper Poses and Composition
Position your subject at an optimal distance from the backdrop to reduce shadows and maintain a sharp focus on the subject.
Next, experiment with poses that complement the backdrop color and texture. This ensures your subject stands out while creating a cohesive visual appeal.
Use the rule of thirds to place your subject off-center, enhancing balance and preventing monotonous compositions.
Pay attention to body language and facial expressions to convey the desired mood. A relaxed pose might suit a warm, earthy backdrop, while a more dynamic stance could complement a vibrant, bold backdrop.
Always adjust poses and compositions to create harmony between your subject and the backdrop.
Post-Processing Tips
When post-processing your photos, use various software to refine the backdrop and enhance your subject's integration.
Editing techniques to enhance the backdrop
To enhance the backdrop, start by using photo editing software like Photoshop to adjust the colors, contrast, and brightness.
Implement advanced editing techniques to enrich the backdrop, ensuring it complements and elevates your subject.
Use background removal tools to achieve a clean separation between the subject and the backdrop. Zoom in to refine edges, addressing any irregularities that may detract from the overall polish.
Experiment with various filters and effects to find the perfect aesthetic balance. Pay close attention to detail, ensuring the backdrop remains seamless and professional.
Save your edited images in the appropriate format for the intended platform. This ensures optimal quality and consistency across all your visuals.
Software recommendation
For intricate background editing, Photoshop offers advanced retouching and compositing capabilities.
Lightroom excels in batch editing. It can streamline multiple backdrop adjustments simultaneously.
GIMP, a free alternative, provides robust tools for backdrop manipulation and enhancement.
Capture One shines in color editing. It allows you to fine-tune backdrop tones and textures with precision.
Luminar AI uses artificial intelligence to simplify complex backdrop enhancements. It's perfect for both novices and professionals.
Common Mistakes to Avoid
There are several common mistakes you should avoid when using a photography backdrop.
Misalignment of the backdrop
Misalignment of the backdrop can derail your entire photoshoot by introducing distracting elements and compromising the framing of your subject. To avoid misalignment, ensure the backdrop perfectly aligns with your subject. Use a sturdy backdrop stand or wall hooks to secure it, preventing any shifting during the shoot.
Pay close attention to the edges of the backdrop. They should be straight and parallel to the camera lens. This careful alignment will maintain the integrity of your composition and create a professional look.
Overcrowded background or distracting patterns
It's equally important to avoid overcrowded backgrounds or distracting patterns. Because these can detract from your subject.
Busy patterns and distracting elements can overwhelm the viewer. They cause the subject to blend into the background rather than stand out. To maintain a professional look, choose backdrops with neutral or solid colors that complement the subject.
Keep the background simple and uncluttered, allowing your subject to be the focal point of the image.
Poor lighting
Proper lighting setup is crucial to avoid casting unflattering shadows that can detract from the overall quality of your photograph. Start by positioning your lighting sources to remove harsh shadows on your subject against the backdrop.
Use diffused lighting, such as softboxes or umbrellas, to create an even, flattering light. Place your key light at a 45-degree angle to the subject to reduce shadows. Incorporate reflectors or bounce cards to fill in any remaining shadows and achieve balanced lighting.
Experiment with different lighting angles and distances to ensure optimal illumination. Properly managing your lighting will result in more professional, polished photographs.
Conclusion: How to Use a Photography Backdrop
In conclusion, mastering the use of a photography backdrop involves selecting the right material and color, setting it up securely, and ensuring it's wrinkle-free.
Pay close attention to lighting to avoid shadows and reflections. Use props and accessories to add depth, and direct your subject with thoughtful poses and composition.
Post-processing can enhance your images, so don't skimp on it. By avoiding common mistakes, you'll elevate your photography to professional standards.
Discover more backdrop knowledge at IdeasBackdrop Blog! Dive into the backdrop world with IdeasBackdrop!
FAQs
How Do Photographers Use Backdrops?
To use a backdrop, first choose the appropriate size and material. Secure it with clamps or stands. Ensure it's wrinkle-free. Position lighting to highlight your subject. Experiment with angles and distances for optimal composition and professional results.
How Can I Take Good Pictures With a Backdrop?
Ensure the backdrop is wrinkle-free and well-lit. Position your subject at the optimal distance to avoid shadows. Use complementary colors. Adjust your camera settings for proper exposure. Experiment with angles and focal lengths for diverse compositions.
Do Photographers Still Use Backdrops?
Yes, photographers still use backdrops to control the shooting environment, eliminate distractions, and achieve a professional look. Opt for seamless paper or fabric backdrops, secure them with clamps, and adjust lighting for optimal results.
How to Put up a Photo Backdrop?
To put up a photo backdrop, mount it on a stand or use wall hooks. Secure it with clamps, ensuring it's wrinkle-free. Adjust the height and position to frame your subject perfectly, then set up your lighting.


